How to Add a Chiller to a DIY Cold Plunge
To add a diy cold plunge chiller, connect the chiller in a closed loop with a pump, filter, and insulated tub. Place the chiller on level ground, run food-safe hoses, prime the pump, and check for leaks before the first plunge.
On this page (12 sections)
- Can you add a chiller to a DIY cold plunge later?
- Which parts do you need for a DIY cold plunge chiller setup?
- How do you size a chiller for a homemade plunge?
- Where should you place the chiller and pump?
- How do you connect hoses without leaks?
- How do you set up filtration with a chiller?
- What temperature should your DIY cold plunge hold?
- How do you run the chiller day to day?
- Can you use a chiller with a bathtub or a kit?
- How do you combine sauna and cold plunge safely?
- What mistakes should you avoid with a DIY cold plunge chiller?
- Which DIY cold plunge chiller setup should you pick?
To add a diy cold plunge chiller, connect the chiller in a closed loop with a pump, filter, and insulated tub. Place the chiller on level ground, run food-safe hoses, prime the pump, and check for leaks before the first plunge.
A homemade plunge works best when the tub, filter, pump, and chiller act as one system. If you are still choosing a tub, our guide on how to build a diy cold plunge tub covers size, insulation, and fittings before you add cooling.
Can you add a chiller to a DIY cold plunge later?
Yes, you can add a chiller later in most cases. The tub needs safe ports for out and return hoses, plus room for a pump and filter nearby.
Plan the loop before you buy parts. Water should leave the tub, pass through a filter, reach the pump, move into the chiller, then return to the tub.
That order keeps debris out of the cooling unit and helps the pump push water with less strain.
Check weight before you start. A full tub is heavy, so the floor or deck must support it.
Place the chiller outside the tub footprint and keep hoses clear of walking paths.
Which parts do you need for a DIY cold plunge chiller setup?
You need a chiller, a pump, a filter housing, hoses, fittings, and a way to seal each connection. See our chiller with filter guide for help matching those parts.
Food-safe hose and potable-water rated parts are the safe choice for water you will soak in.
Match hose size to pump and chiller ports. A mismatch can cut flow and make cooling slow.
Short, direct hose runs usually work better than long loops with many bends.
You also need a thermometer, a timer or switch, and a ground-fault protected outlet. A thermometer lets you confirm the water is cooling.
A shutoff switch at the tub helps you stop the pump fast if a fitting leaks.
How do you size a chiller for a homemade plunge?
Size the chiller to your water volume, outdoor heat, and target temperature. A small tub in a cool garage needs less cooling than a large tub in direct summer sun.
Insulation matters as much as the chiller itself. An insulated tub holds cold water longer and cuts run time.
A lid helps too, since open water loses cold fast to air, wind, and sun. Shade the tub when you can.
Think in terms of daily use. If you plunge once a week, the chiller can cool the tub before your session.
If you plunge daily, you may keep it running more often.
Where should you place the chiller and pump?
Place the chiller on level, firm ground close to the tub. Keep it out of standing water and away from splash zones.
Leave space around vents so hot air can leave the unit without heating the intake side.
Keep the pump low and close to the water source when possible. A pump that has to suck water up a long hill may lose prime.
A short suction line helps it start fast and run with steady flow.
Run power cords away from wet areas. Use a ground-fault protected outlet and keep plugs off the ground.
Do not run cords through standing water or under a tub lid where they can be pinched.
How do you connect hoses without leaks?
Use one clear path for water out and one clear path for water back. The out line should pull from low in the tub.
The return line should enter near the top or side so cooled water mixes through the tub.
Dry-fit every fitting first. Check thread type, hose barb size, and clamp fit before you add sealant.
Teflon tape helps on threaded fittings, but it will not fix a wrong size or a cracked port.
Backflow and priming matter. Many pumps need water in the housing before they start.
Fill the pump and filter housing by hand, then run the pump for a short test with the return hose pointed into a bucket.
Watch each joint during the first test. Tighten clamps a quarter turn at a time.
Too much force can crack plastic ports or cut hose walls.
What is a DIY cold plunge chiller H3 check?
Use this short check before the first full run. Confirm the filter is in, the pump is primed, the return hose is secure, and the chiller vents are clear.
Then run the system for 10 minutes and watch every joint.
Check temperature after the run. The water should feel cooler at the return side.
If flow is weak, clean the filter, check for air in the line, and look for a kinked hose.
How do you set up filtration with a chiller?
Put the filter before the pump and chiller when you can. That order catches hair and grit before they reach moving parts.
Our guide on how to add a filter to a diy cold plunge walks through housing choice and cartridge care.
A basic cartridge filter is common for a homemade setup. It will not make water sterile, but it helps keep the loop clean.
Skim the surface before each use.
Change cartridges on schedule, not when flow drops. Low flow puts strain on the pump and can make the chiller cycle poorly.
Keep a spare cartridge on hand.
What temperature should your DIY cold plunge hold?
Pick a target you can tolerate and hold it steady. Many people start in the 50s Fahrenheit and move colder only if they want to.
Our guide on what temperature is a cold plunge covers common ranges and safe habits.
Use a thermometer in the water, not just a dial on the chiller. The chiller display can lag behind the tub, especially in warm weather.
Stir the water a little before you read it.
Keep sessions short at first. Cold water can stress the body fast, and warnings from the CDC on cold water safety are worth reading at cdc.gov.
If you have heart, blood pressure, circulation, or nerve issues, talk with a doctor before you plunge.
How do you run the chiller day to day?
Start the chiller early enough to reach your target. A large tub may need hours, not minutes.
A timer can start the pump and chiller before you wake, but test it first so a leak does not run all night.
Check hoses and clamps each week. Sun and heat can make rubber parts stiff over time.
Look for cracks, loose clamps, and green or cloudy water. Drain and refill when water looks off or smells odd.
Clean the chiller vents with a soft brush. Dust blocks airflow and forces the unit to work harder.
Keep grass, leaves, and storage boxes away from the intake side.
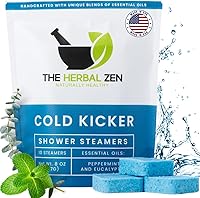
Those steamers fit the post-plunge shower step. The blend uses peppermint and eucalyptus essential oils, with no synthetic fragrance, and each pack holds 10 steamers made in the USA.
Can you use a chiller with a bathtub or a kit?
Yes, some bathtubs and kits can take a chiller, but the fit is tighter. If your plan is a tub you already own, our guide on how to turn your bathtub into a cold plunge explains space and hose limits.
A kit can make the job simpler. Our picks for best diy cold plunge kit options show how matched parts reduce guesswork.
Kits still need a filter, a drain plan, and a safe power spot.
If you are still shopping, our roundup of best cold plunge chillers can help you match cooling power to tub size. Compare flow rate, hose size, and noise before you choose.
How do you combine sauna and cold plunge safely?
Keep sauna and plunge separate until you know how your body responds. Many people use heat first, then cold, then rest.
Our guide on how to use a sauna and cold plunge explains timing, hydration, and signs to stop.
Start with one, not both, if you are new. Get used to cold water alone first.
Add sauna heat later in short sessions. Drink water before and after, and sit down if you feel dizzy.
Do not use alcohol around a plunge setup. Keep a phone nearby, tell someone you are plunging, and keep the area clear of cords and hoses.
What mistakes should you avoid with a DIY cold plunge chiller?
The most common mistake is to buy a chiller first and plan plumbing later. Measure port size, hose length, and filter space before you order.
A strong chiller with thin hoses will still cool slowly.
Another mistake is to skip a test run. Run the full loop for at least 30 minutes before your first plunge.
Watch for leaks, weak flow, air bubbles, and loud pump noise.
Do not ignore water care. A chiller cools water, but it does not clean it.
Skim, filter, and change water on a schedule. If you want a basic primer first, what is a cold plunge explains the terms and use cases.
Which DIY cold plunge chiller setup should you pick?
Pick a standard loop if you want simple parts and easy repairs. Pick a kit if you want matched fittings and less guesswork.
Pick a smaller chiller if your tub is small, shaded, and insulated.
Match the chiller to tub size, then match hoses and filter to flow. That order prevents the most common DIY cold plunge chiller problem: a unit that cannot keep up because plumbing or insulation is weak.
Start with best diy cold plunge kit options if you want a matched set, or add parts one at a time if you already own a tub. Test the loop, check the temperature, and build your routine from there.
Frequently asked questions
Can I add a chiller to a DIY cold plunge after I build it?
Yes, most homemade tubs can take a chiller later if they have space for hoses and a pump. You will need a way to move water out of the tub, through a filter, into the chiller, and back again.
Check the tub wall, floor strength, and power access before you drill or buy fittings.
What temperature should a DIY cold plunge run at?
Many people aim for the range in our guide to what temperature a cold plunge should be, often from the 40s to the 50s in Fahrenheit. Your comfort, tolerance, and any health conditions matter more than a single number.
Start warmer, keep sessions short, and get medical advice if you have heart or circulation concerns.
Do I need a filter with a DIY cold plunge chiller?
Yes, a filter helps keep hair, skin oils, and debris away from the pump and chiller. A simple cartridge setup is common for a homemade rig.
Clean or swap the cartridge on schedule, and check the pump screen often so flow stays strong and the chiller does not strain.
Where should the chiller sit next to a homemade plunge?
Put the chiller on firm, level ground close to the tub but away from splash and standing water. Keep the power cord dry, leave air space around vents, and run hoses where you will not trip.
A shaded, covered spot can help the unit work with less strain in hot weather.